

What are the installation steps for a welded bus duct flange?
Sep 30, 2025
Leave a message
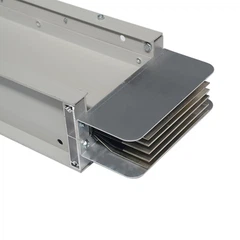
Hey there! As a supplier of Bus Duct Flanges, I'm super stoked to walk you through the installation steps for a welded bus duct flange. Whether you're a seasoned electrician or just starting out in the electrical field, understanding these steps is crucial for a successful installation. So, let's dive right in!
Step 1: Preparation
Before you even think about welding that bus duct flange, you need to make sure you've got everything in order. First off, gather all the necessary tools and materials. You'll need a welding machine, appropriate welding rods, a grinder, a measuring tape, a level, and of course, the bus duct flange itself. It's also a good idea to have some safety gear on hand, like welding gloves, a welding helmet, and safety glasses.
Next, inspect the bus duct and the flange for any damage or defects. Make sure the dimensions of the flange match the bus duct, and that there are no cracks or other issues that could affect the installation. If you notice any problems, it's best to replace the damaged parts before proceeding.
Once you've checked everything over, clean the surfaces of the bus duct and the flange. Use a grinder to remove any rust, paint, or other debris that could interfere with the welding process. A clean surface will ensure a strong and reliable weld.
Step 2: Positioning the Flange
Now that you're all set up, it's time to position the flange on the bus duct. Use a measuring tape and a level to make sure the flange is centered and level. This is important because an uneven flange can cause problems with the electrical connection and the overall performance of the bus duct.
Mark the position of the flange on the bus duct using a marker or a scribe. This will help you keep the flange in place while you're welding. You can also use clamps to hold the flange in position, but be careful not to overtighten them, as this could damage the flange or the bus duct.
Step 3: Tack Welding
Once the flange is in position, it's time to start tack welding. Tack welding is a temporary welding process that holds the flange in place until you can complete the full weld. It's important to use the right welding technique and the correct welding rods for tack welding.
Start by making a few small welds around the perimeter of the flange. These welds should be about 1/4 to 1/2 inch long and spaced evenly apart. Make sure the welds are strong enough to hold the flange in place, but not so strong that they cause distortion or warping.
After you've made the tack welds, check the alignment of the flange again. Use a level and a measuring tape to make sure everything is still centered and level. If you notice any issues, you can adjust the position of the flange by gently tapping it with a hammer or by using a pry bar.
Step 4: Full Welding
Once you're satisfied with the alignment of the flange, it's time to complete the full weld. This is the most important step in the installation process, as it determines the strength and reliability of the connection between the flange and the bus duct.
Use a continuous welding technique to create a strong and uniform weld around the perimeter of the flange. Make sure the weld penetrates the full thickness of the flange and the bus duct. This will ensure a secure and long-lasting connection.


As you're welding, be careful not to overheat the flange or the bus duct. Overheating can cause distortion, warping, and other issues that could affect the performance of the bus duct. Use a welding schedule that is appropriate for the thickness of the materials and the type of welding machine you're using.
Step 5: Cleaning and Inspection
After you've completed the full weld, it's time to clean up the area. Use a grinder to remove any excess weld material and to smooth out the surface of the weld. This will help prevent any sharp edges or rough spots that could cause problems with the electrical connection.
Once the area is clean, inspect the weld for any defects. Look for cracks, porosity, or other issues that could affect the strength and reliability of the connection. If you notice any problems, it's best to repair the weld before proceeding.
Step 6: Testing
Before you put the bus duct into service, it's important to test the electrical connection. Use a multimeter or other testing equipment to check the continuity and resistance of the connection. This will help ensure that the bus duct is functioning properly and that there are no electrical issues.
If the test results are satisfactory, you can proceed with the final installation of the bus duct. Make sure all the connections are tight and secure, and that the bus duct is properly grounded.
Conclusion
Well, there you have it! Those are the basic installation steps for a welded bus duct flange. By following these steps, you can ensure a successful installation and a reliable electrical connection.
If you're in the market for high-quality Bus Duct Flanges, be sure to check out our Bus Duct Flange products. We also offer Non-Standard Bus Duct Flange End and New Generation Sandwich Busduct options to meet your specific needs.
If you have any questions or need more information, don't hesitate to reach out. We're here to help you with all your bus duct flange needs. Whether you're a contractor, an electrician, or a facility manager, we've got the products and expertise to get the job done right. So, if you're looking to purchase bus duct flanges, let's start a conversation and discuss your requirements.
References
- Electrical Installation Handbook, Schneider Electric
- Welding Handbook, American Welding Society
Send Inquiry