

What are the installation steps for Tinned Copper Busbar in power distribution cabinets?
Nov 19, 2026
Leave a message
Hey there! As a supplier of tinned copper busbars, I'm super stoked to walk you through the installation steps for these bad boys in power distribution cabinets. Tinned copper busbars are a crucial component in electrical systems, providing a reliable and efficient way to distribute power. So, let's dive right in!
Step 1: Preparation
Before you start the installation, it's essential to gather all the necessary tools and materials. You'll need a measuring tape, a hacksaw or a busbar cutter, a drill, a torque wrench, and of course, the tinned copper busbars. Make sure you have the right size and length of busbars for your power distribution cabinet. Also, check the cabinet's specifications to ensure that the busbars will fit properly.

It's a good idea to lay out all the busbars and components on a clean, flat surface. This will help you visualize the installation process and make sure you have everything you need. Take your time to measure and mark the busbars according to the cabinet's layout. Precision is key here, so double-check your measurements before making any cuts.
Step 2: Cutting the Busbars
Once you've measured and marked the busbars, it's time to cut them to the appropriate length. If you're using a hacksaw, make sure to use a fine-tooth blade to get a clean cut. For a more precise and efficient cut, you can use a busbar cutter. Just follow the manufacturer's instructions and make sure to wear safety goggles and gloves.
After cutting the busbars, use a file to smooth out any rough edges. This will prevent any sharp edges from causing damage to the insulation or other components in the cabinet. It's also a good idea to deburr the holes if you've drilled any for mounting.
Step 3: Drilling Holes
Depending on the design of your power distribution cabinet, you may need to drill holes in the busbars for mounting. Use a drill bit that's the appropriate size for the bolts or screws you'll be using. Make sure to drill the holes straight and at the correct locations. You can use a template or a marking guide to ensure accuracy.
When drilling the holes, be careful not to drill too deep or too close to the edge of the busbar. This could weaken the busbar and cause it to break or crack. After drilling the holes, clean out any metal shavings or debris.
Step 4: Mounting the Busbars
Now it's time to mount the busbars in the power distribution cabinet. Start by positioning the busbars in the cabinet according to the layout. Use bolts or screws to secure the busbars to the cabinet. Make sure to use the correct torque when tightening the bolts or screws. Over-tightening can damage the busbars, while under-tightening can cause loose connections.
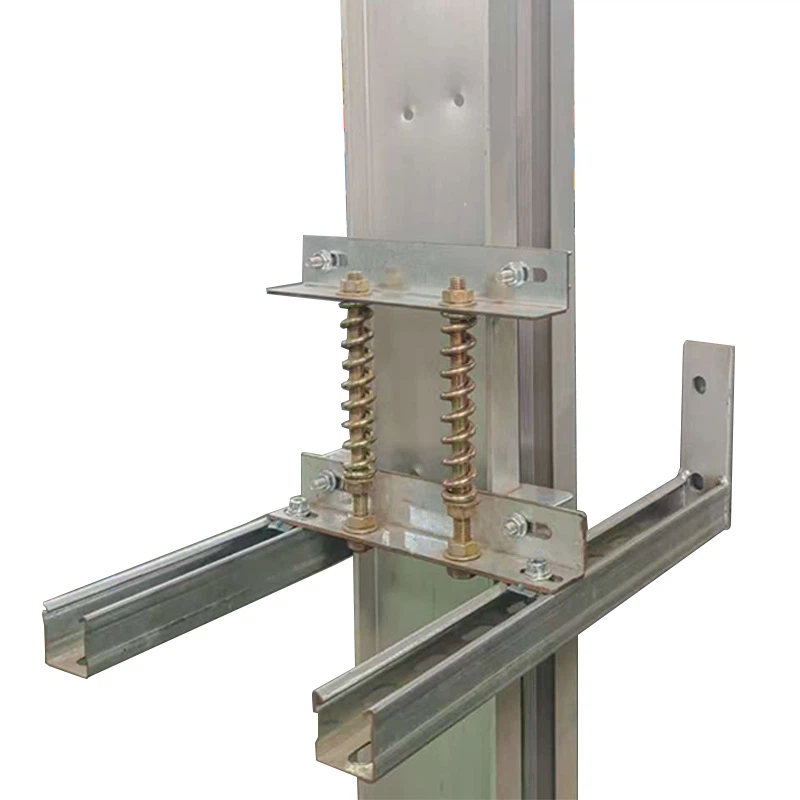
If you're using a Busway Spring Support, make sure to install it properly. This support helps to reduce vibration and stress on the busbars, ensuring a more stable and reliable connection.
Step 5: Connecting the Busbars
Once the busbars are mounted, it's time to connect them to the electrical components in the cabinet. This may include circuit breakers, switches, and other devices. Use appropriate connectors and terminals to make the connections. Make sure to follow the manufacturer's instructions and use the correct torque when tightening the connections.
It's important to ensure that all the connections are secure and free of any loose wires or connections. Loose connections can cause overheating, arcing, and other electrical problems. Double-check all the connections before powering on the cabinet.
Step 6: Insulation and Protection
After connecting the busbars, it's important to insulate them to prevent any electrical shorts or accidents. You can use insulation tape or heat shrink tubing to cover the exposed parts of the busbars. Make sure to use high-quality insulation materials that are rated for the voltage and current of your electrical system.
In addition to insulation, you may also need to install protective covers or enclosures to prevent accidental contact with the busbars. This is especially important in areas where there is a risk of human contact or where the busbars are exposed to the elements.
Step 7: Testing and Commissioning
Once the installation is complete, it's time to test the power distribution cabinet. Before powering on the cabinet, make sure to check all the connections and insulation. Use a multimeter to test the voltage and continuity of the busbars. Make sure that all the electrical components are functioning properly.
If everything checks out, you can slowly power on the cabinet and monitor the system for any signs of problems. Check for any abnormal noises, overheating, or other issues. If you encounter any problems, shut down the system immediately and troubleshoot the issue.
Step 8: Maintenance and Inspection
Regular maintenance and inspection are essential to ensure the long-term performance and safety of your power distribution cabinet. Make sure to inspect the busbars and connections regularly for any signs of wear, corrosion, or damage. Clean the busbars and remove any dirt or debris that may accumulate over time.
If you notice any problems or issues, make sure to address them immediately. Replace any damaged or worn components as needed. By following a regular maintenance schedule, you can prevent costly repairs and downtime.
Conclusion
Installing tinned copper busbars in power distribution cabinets is a critical process that requires careful planning and attention to detail. By following these installation steps, you can ensure a safe and reliable electrical system. If you have any questions or need further assistance, don't hesitate to reach out to us. We're here to help you with all your tinned copper busbar needs. Whether you're a small business or a large industrial facility, we can provide you with high-quality busbars and expert advice. So, if you're in the market for tinned copper busbars, give us a call or send us an email. Let's start a conversation and see how we can work together to meet your power distribution needs.
References
- Electrical Installation Handbook, Schneider Electric
- National Electrical Code (NEC), National Fire Protection Association
Send Inquiry