How to install a busway spring support on a busway with a non - standard size?
Nov 27, 2025
Leave a message
Hey there! As a supplier of Busway Spring Support, I've seen firsthand the challenges that come with installing these supports on busways, especially those with non - standard sizes. In this blog, I'll walk you through the process step by step, sharing some tips and tricks I've picked up over the years.
Understanding the Basics
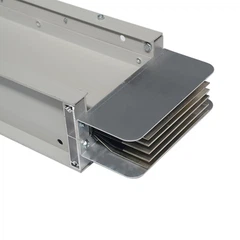
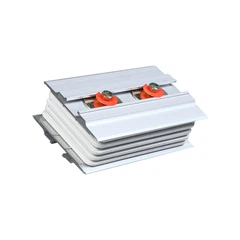
Before we jump into the installation process, let's quickly go over what a Busway Spring Support is and why it's important. A busway spring support is designed to provide flexible support for busways. It helps absorb vibrations, compensate for thermal expansion and contraction, and ensures the busway stays in place even under various operating conditions.
When dealing with non - standard sized busways, things can get a bit tricky. Non - standard sizes might mean different dimensions, weights, or configurations compared to the typical busways. But don't worry, with the right approach, you can still install the spring support effectively.


Step 1: Measure and Assess the Busway
The first thing you need to do is measure the non - standard busway accurately. Use a reliable measuring tool to get the length, width, and height of the busway. Also, note down its weight. This information is crucial as it will help you select the appropriate spring support.
You should also assess the environment where the busway will be installed. Is it a high - vibration area? Are there extreme temperature changes? Understanding these factors will help you choose a spring support that can withstand the specific conditions.
Step 2: Select the Right Spring Support
Based on the measurements and assessment of the busway, it's time to select the right Busway Spring Support. Look for a support that can handle the weight of the busway and provide the necessary flexibility.
If you're not sure which support is the best fit, don't hesitate to reach out to us. We have a team of experts who can help you make the right choice based on your specific requirements.
Step 3: Prepare the Installation Area
Once you have the right spring support, it's time to prepare the installation area. Clean the surface where the support will be attached. Make sure there are no debris, dust, or grease that could affect the installation.
Check the mounting points on the busway. If they are not in the right position or are damaged, you may need to make some adjustments. You might need to drill new holes or repair existing ones. Just be careful not to damage the busway during this process.
Step 4: Install the Spring Support
Now comes the actual installation. Start by attaching the spring support to the mounting points on the busway. Use the appropriate bolts and nuts to secure it firmly. Make sure the support is level and properly aligned.
During the installation, you may need to use some tools like wrenches or screwdrivers. Follow the manufacturer's instructions carefully. If you encounter any problems, such as difficulty in tightening the bolts or misalignment, stop and double - check your work.
Step 5: Test the Installation
After the spring support is installed, it's important to test it. Apply some gentle pressure to the busway to see how the support responds. Check for any signs of looseness or instability.
If the busway is already energized, monitor it closely for a while to ensure that the spring support is working as expected. Look for any abnormal vibrations or movements.
Tips for Installing on Non - Standard Busways
- Customization: In some cases, you may need a customized spring support for your non - standard busway. We offer customization services to meet your unique needs. Just provide us with the detailed specifications, and we'll create a support that fits perfectly.
- Use of Additional Accessories: Depending on the busway's size and configuration, you may need to use additional accessories like Tinned Copper Busbar or Busway Tap - off Box. These accessories can enhance the performance and functionality of the busway system.
- Safety First: Always wear appropriate safety gear during the installation process, such as gloves and safety glasses. Follow all safety regulations to avoid any accidents.
Conclusion
Installing a busway spring support on a non - standard sized busway may seem challenging, but with the right steps and a bit of know - how, it can be done successfully. Remember to measure accurately, select the right support, prepare the installation area, install carefully, and test thoroughly.
If you have any questions or need further assistance with the installation or selection of Busway Spring Support, don't hesitate to contact us. We're here to help you ensure a smooth and reliable busway installation. Whether you're a small - scale contractor or a large - scale industrial client, we can provide the products and support you need. So, if you're in the market for busway spring supports or related accessories, let's start a conversation and see how we can work together to meet your requirements.
References
- Electrical Installation Handbook, various editions
- Manufacturer's guidelines for Busway Spring Support products
Send Inquiry