How to connect outdoor bus duct sections?
Nov 20, 2025
Leave a message
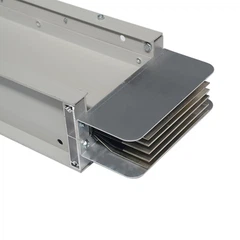
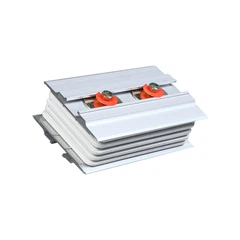
Hey there! I'm a supplier of Outdoor Bus Duct, and today I'm gonna share with you how to connect outdoor bus duct sections. It's a crucial process, and getting it right can make a huge difference in the performance and safety of your electrical system.
First things first, let's talk about why connecting outdoor bus duct sections properly is so important. Outdoor bus ducts are used to transmit electrical power in various outdoor settings, like industrial complexes, commercial buildings, and even some large - scale residential areas. When the connections between sections are not made correctly, it can lead to power losses, overheating, and in the worst - case scenario, electrical failures or fires. So, it's definitely worth taking the time to do it right.
Preparation Before Connection
Before you start connecting the outdoor bus duct sections, there are a few key steps you need to take.
Inspection
Inspect each bus duct section thoroughly. Check for any physical damage, like cracks, dents, or scratches on the outer casing. Also, examine the conductive bars inside. They should be clean, free of corrosion, and have no signs of deformation. If you find any issues, don't use that section. Instead, either repair it if possible or replace it with a new one. You can find high - quality outdoor bus duct sections at Outdoor Bus Duct.
Cleaning
Clean both the ends of the bus duct sections that will be connected. Use a clean, dry cloth to remove any dust, dirt, or debris. For stubborn stains or corrosion on the conductive bars, you can use a mild abrasive cleaner, but make sure to follow the manufacturer's instructions. After cleaning, wipe the bars dry to prevent any moisture from causing problems later.
Measuring
Measure the alignment of the bus duct sections. They need to be perfectly aligned both horizontally and vertically. Misaligned sections can cause uneven electrical distribution and increase the risk of overheating. You can use measuring tools like a level and a straightedge to ensure accurate alignment.
Tools and Materials Needed
To connect the outdoor bus duct sections, you'll need a few tools and materials:
- Insulated Wrenches: These are used to tighten the bolts that hold the bus duct sections together. Make sure the wrenches are the right size for the bolts on your bus duct.
- Torque Wrench: A torque wrench is essential to ensure that the bolts are tightened to the correct torque specification. Over - tightening or under - tightening the bolts can lead to poor electrical connections.
- Sealing Gaskets: These gaskets are placed between the bus duct sections to prevent moisture, dust, and other contaminants from entering the connection. They also help to maintain the integrity of the electrical insulation.
- Conductive Grease: Applying a thin layer of conductive grease to the conductive bars before connection can improve the electrical conductivity and reduce the risk of corrosion.
The Connection Process
Step 1: Apply Conductive Grease
Take a small amount of conductive grease and apply a thin, even layer to the conductive bars of both bus duct sections. Make sure to cover the entire surface that will be in contact when the sections are connected. This will help to create a better electrical connection and prevent oxidation.


Step 2: Place the Sealing Gasket
Carefully place the sealing gasket between the two bus duct sections. Make sure it is centered and properly aligned. The gasket should fit snugly around the conductive bars and the edges of the bus duct.
Step 3: Align the Sections
Using the measuring tools, align the two bus duct sections so that the conductive bars are perfectly in line with each other. This is a critical step, as even a small misalignment can cause problems.
Step 4: Insert the Bolts
Insert the bolts through the pre - drilled holes in the bus duct sections. Make sure the bolts are clean and free of any debris. If necessary, you can use a thread lubricant to make it easier to insert the bolts.
Step 5: Tighten the Bolts
Use the insulated wrenches to start tightening the bolts. Then, use the torque wrench to tighten them to the specified torque value. Refer to the manufacturer's instructions for the correct torque specification. Over - tightening can damage the bus duct, while under - tightening can result in a loose connection.
Step 6: Check the Connection
After tightening the bolts, visually inspect the connection. Make sure the sections are firmly joined together and there are no gaps or misalignments. You can also use a multimeter to check the electrical conductivity across the connection. The resistance should be within the acceptable range.
Special Considerations for Outdoor Use
Since outdoor bus ducts are exposed to the elements, there are a few additional things to keep in mind:
- Weatherproofing: Make sure the connections are properly weatherproofed. In addition to using sealing gaskets, you can also apply a weather - resistant sealant around the edges of the connection to provide extra protection against moisture and dirt.
- Temperature Changes: Outdoor temperatures can vary significantly. The bus duct and its connections need to be able to withstand these temperature changes without losing their integrity. Choose bus duct sections that are designed for outdoor use and can handle a wide range of temperatures.
- UV Protection: The sun's UV rays can cause damage to the outer casing of the bus duct over time. Look for bus duct sections that have UV - resistant coatings to prevent degradation.
Other Related Bus Duct Products
If you're also interested in other types of bus ducts, we have some great options. For underground applications, check out Underground Bus Duct. It's designed to be durable and resistant to the unique challenges of underground environments, like moisture and soil pressure.
And if you're looking for the latest technology in bus duct systems, the New Generation Cast Resin Busway is a great choice. It offers improved performance, higher efficiency, and better safety features.
Conclusion
Connecting outdoor bus duct sections is a process that requires attention to detail and the right tools. By following the steps outlined above and considering the special requirements for outdoor use, you can ensure a reliable and safe electrical connection.
If you're in the market for high - quality outdoor bus duct sections or have any questions about the connection process, don't hesitate to reach out. We're here to help you make the best choice for your electrical distribution needs. Whether you're working on a small project or a large - scale industrial installation, we have the products and expertise to support you. Let's start a conversation and see how we can meet your requirements!
References
- Electrical Installation Handbook, Schneider Electric
- National Electrical Code (NEC)
Send Inquiry