

How to connect Aluminum Bus Duct sections?
Aug 15, 2025
Leave a message
How to Connect Aluminum Bus Duct Sections
As a seasoned supplier of Aluminum Bus Duct, I've witnessed firsthand the growing demand for efficient and reliable electrical distribution systems. Aluminum bus ducts have emerged as a popular choice due to their lightweight nature, high conductivity, and cost - effectiveness. However, one of the most crucial aspects of using aluminum bus ducts is the proper connection of their sections. In this blog, I'll share some essential steps and tips on how to connect aluminum bus duct sections effectively.
1. Preparation Before Connection
Before starting the connection process, it's essential to carry out thorough preparations. First, inspect the bus duct sections carefully. Check for any physical damage such as dents, scratches, or deformities on the aluminum casing and the conductors inside. Any damage can affect the electrical performance and the mechanical integrity of the connection.
Ensure that the bus duct sections are clean. Use a clean, dry cloth to wipe off any dust, dirt, or debris from the surfaces that will be connected. This is particularly important for the contact surfaces of the conductors, as any foreign particles can increase resistance and lead to overheating.
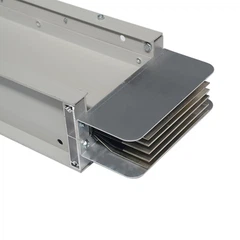
Measure the dimensions of the bus duct sections to ensure they are compatible. The length, width, and height of the sections should match precisely to ensure a proper fit. Additionally, check the alignment of the bolt holes in the Bus Duct Flange. Misaligned bolt holes can make the connection process difficult and may result in a weak connection.
2. Selecting the Right Connection Method
There are several methods for connecting aluminum bus duct sections, and the choice depends on various factors such as the application, the current rating, and the environmental conditions.
Bolted Connections
Bolted connections are one of the most common methods for joining aluminum bus duct sections. They offer a reliable and relatively easy - to - install solution. To make a bolted connection, first, insert the bolts through the aligned holes in the bus duct flanges. Use the appropriate size and type of bolts as recommended by the manufacturer.
Apply a suitable anti - oxidation compound on the contact surfaces of the conductors before tightening the bolts. This compound helps to prevent oxidation and corrosion, which can increase the resistance at the connection point. Tighten the bolts evenly using a torque wrench to the specified torque value. Over - tightening can damage the bus duct, while under - tightening can lead to a loose connection and increased resistance.
Welded Connections
Welded connections provide a permanent and highly conductive joint. However, they require specialized welding equipment and skilled welders. Welding aluminum requires careful control of the welding parameters to avoid issues such as porosity, cracking, and loss of conductivity.
Before welding, clean the surfaces to be welded thoroughly to remove any oxide layers. Use a filler material that is compatible with the aluminum alloy of the bus duct. After welding, perform a non - destructive test such as ultrasonic testing or X - ray inspection to ensure the quality of the weld.
3. Ensuring Electrical Continuity
Electrical continuity is crucial for the proper functioning of the aluminum bus duct system. To ensure good electrical continuity, make sure that the conductors in the bus duct sections are in direct contact with each other. Check the contact surfaces for any signs of oxidation or contamination and clean them if necessary.
Use a low - resistance measuring device such as a micro - ohmmeter to measure the resistance across the connection point. The measured resistance should be within the acceptable range specified by the manufacturer. If the resistance is too high, re - check the connection, clean the surfaces, and tighten the bolts or re - weld if necessary.
4. Sealing and Protection
Once the bus duct sections are connected, it's important to seal the joints to protect the system from environmental factors such as dust, moisture, and chemicals. Use a suitable sealing material such as silicone rubber gaskets or sealants. Apply the sealant evenly around the edges of the bus duct flanges to create a watertight and airtight seal.
In addition to sealing, consider providing additional protection to the bus duct system. For example, install a protective covering or enclosure to prevent physical damage and to comply with safety regulations.
5. Testing and Commissioning
After connecting the aluminum bus duct sections, perform a series of tests to ensure the proper functioning of the system. Conduct an insulation resistance test to check the integrity of the insulation. Use a megohmmeter to measure the insulation resistance between the conductors and the ground. The measured value should be within the acceptable range.
Perform a high - potential (hipot) test to check the dielectric strength of the insulation. This test involves applying a high voltage to the bus duct for a specified period to detect any insulation breakdown.


Finally, conduct a load test to verify the performance of the bus duct under normal operating conditions. Monitor the temperature, voltage, and current during the load test to ensure that the system is operating within the design parameters.
6. Maintenance Considerations
Regular maintenance is essential to ensure the long - term performance and reliability of the aluminum bus duct system. Inspect the connections periodically for signs of wear, corrosion, or overheating. Check the tightness of the bolts and re - tighten them if necessary.
Clean the bus duct sections and the connection points to remove any dust, dirt, or debris. Replace any damaged or worn - out components such as gaskets, bolts, or conductors promptly.
Comparison with Copper Bus Duct
While aluminum bus ducts have many advantages, it's worth comparing them with Copper Bus Duct. Copper has a higher conductivity than aluminum, which means that copper bus ducts can carry more current for the same cross - sectional area. However, copper is more expensive and heavier than aluminum.
Aluminum bus ducts are a cost - effective alternative, especially for applications where weight is a concern. The lower cost of aluminum makes it a popular choice for large - scale electrical distribution systems.
The Role of Bus Duct Tap Off Unit
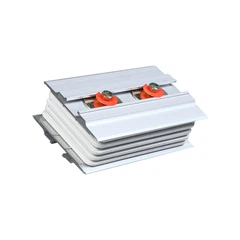
The Bus Duct Tap Off Unit plays an important role in the aluminum bus duct system. It allows for the easy connection of electrical loads to the main bus duct. When connecting the tap - off unit, follow the same principles as for connecting the bus duct sections. Ensure proper alignment, electrical continuity, and sealing.
In conclusion, connecting aluminum bus duct sections requires careful planning, proper selection of connection methods, and strict adherence to installation and testing procedures. By following these guidelines, you can ensure a reliable and efficient electrical distribution system.
If you're in the market for high - quality aluminum bus ducts or need more information on their installation and connection, I encourage you to reach out to us. We have a wide range of products and the expertise to help you with your electrical distribution needs. Our team of professionals can provide you with detailed technical support and guidance throughout the procurement and installation process. Contact us today to start discussing your requirements and find the best solution for your project.
References
- Electrical Installation Handbook, Schneider Electric
- Aluminum Association Technical Papers on Aluminum Bus Ducts
- National Electrical Code (NEC) for guidelines on electrical installations
Send Inquiry